Network interface teaming, also known as NIC teaming or LACP (Link Aggregation Control Protocol), is a valuable feature for improving both performance and redundancy in Windows Server environments. By combining multiple physical network adapters, you can increase available bandwidth and provide failover in case of hardware issues.
All our bare metal servers are equipped with compatible network interfaces, so you can take advantage of NIC teaming and LACP for greater network reliability and throughput.
📌 Step 1: Access NIC Teaming
-
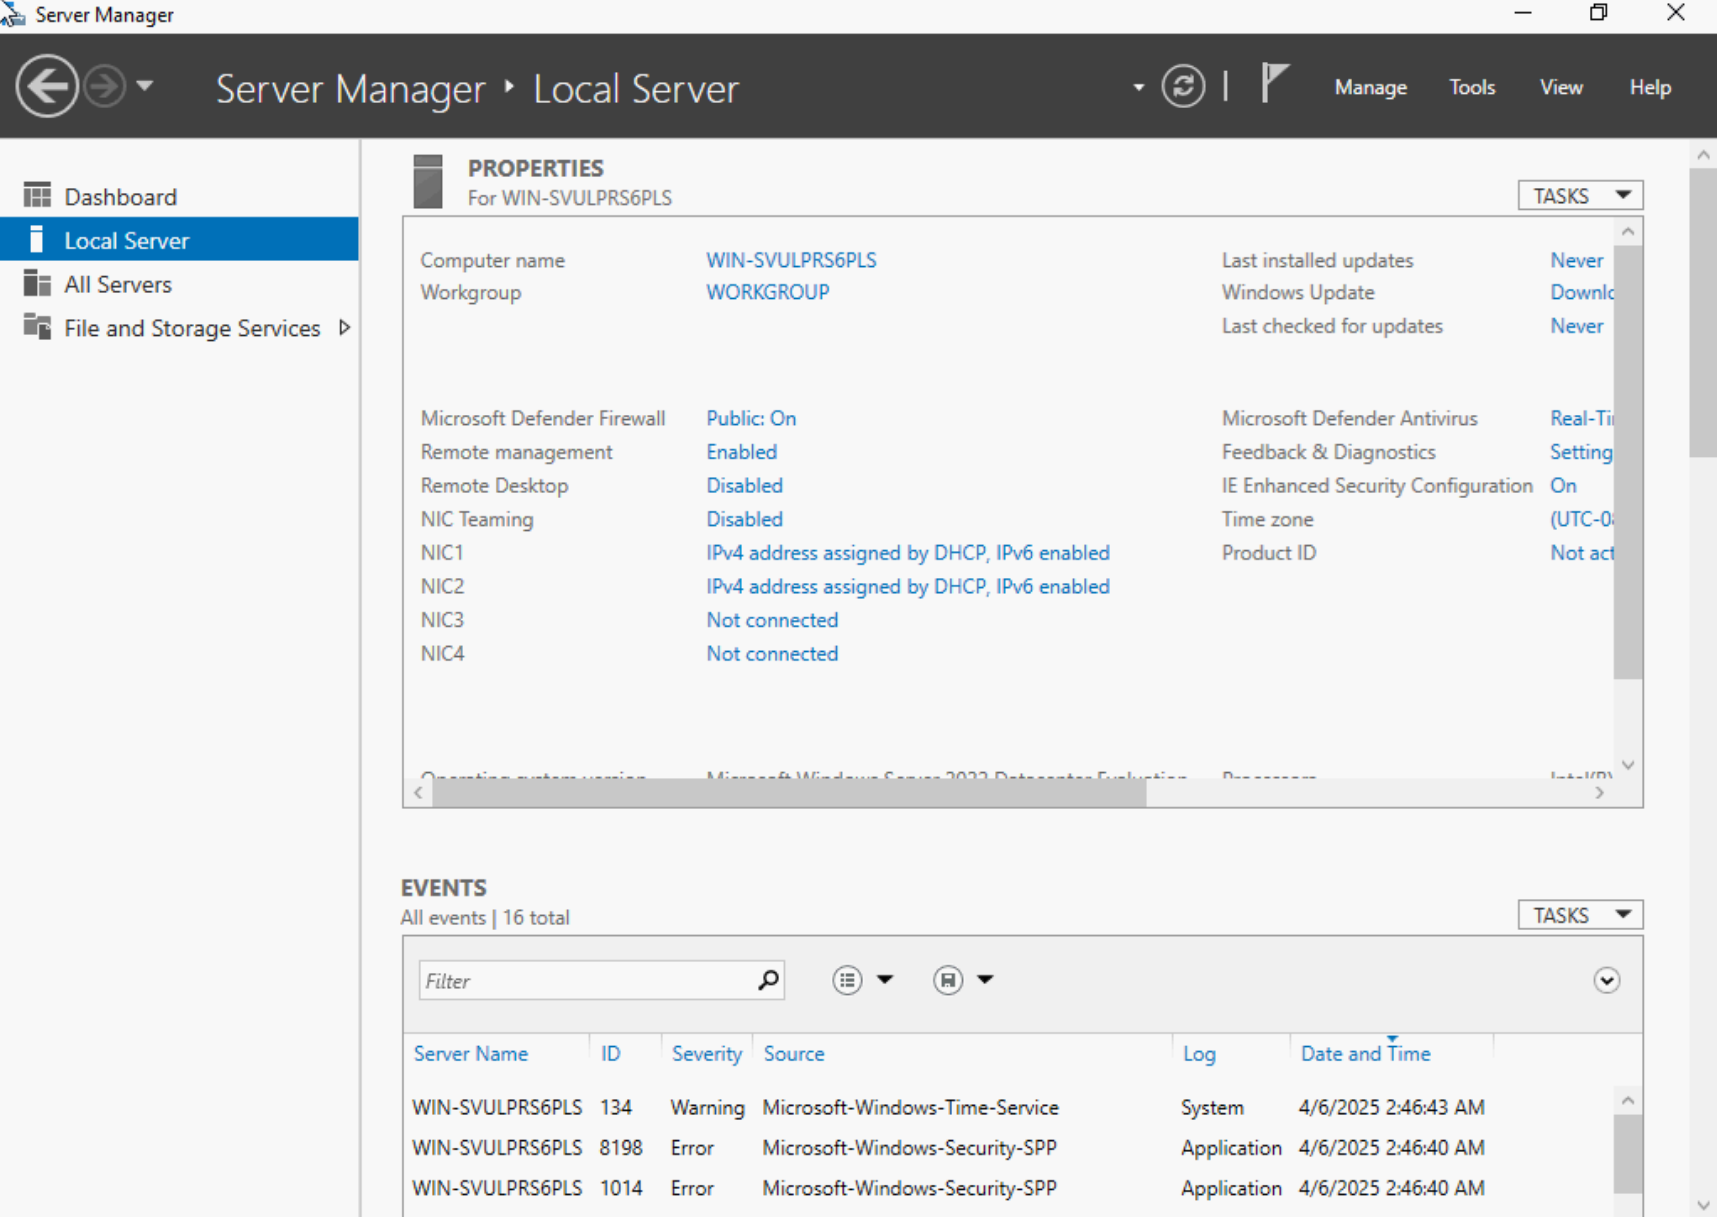
Open Server Manager.
-
On the left-hand menu, click Local Server.
-
Find the NIC Teaming option (it will likely say “Disabled”).
-
Click on the word Disabled to open the NIC Teaming configuration window.
📌 Step 2: Create a New Team
-
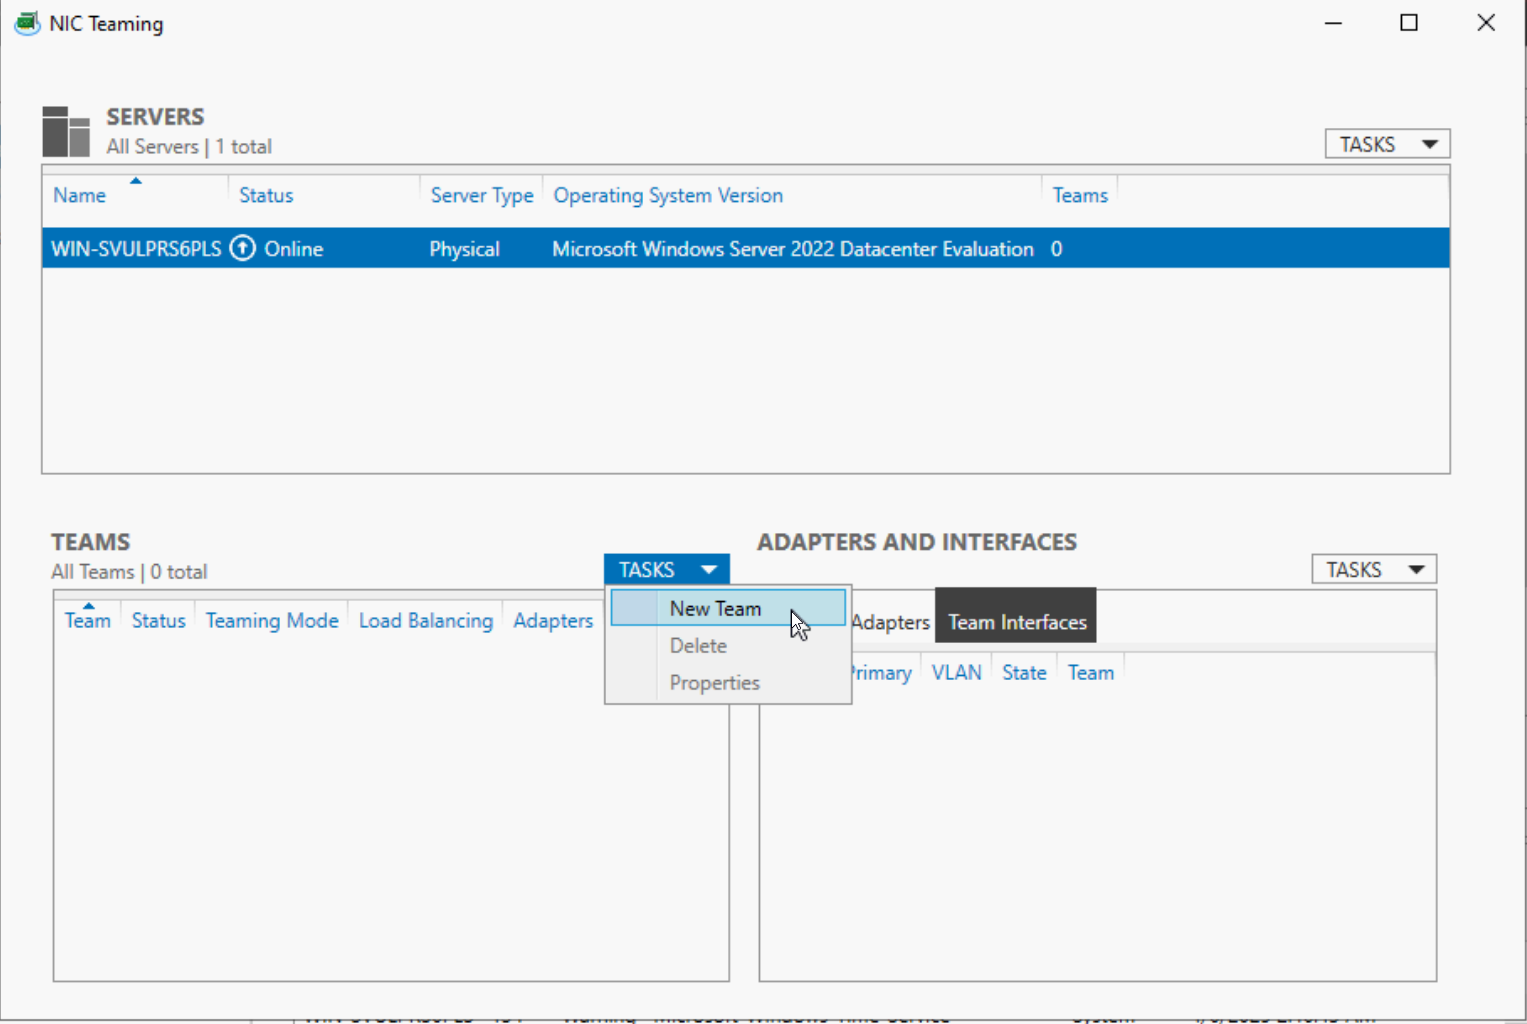
In the “NIC Teaming” window, click on the Tasks dropdown in the Teams section and select New Team.
-
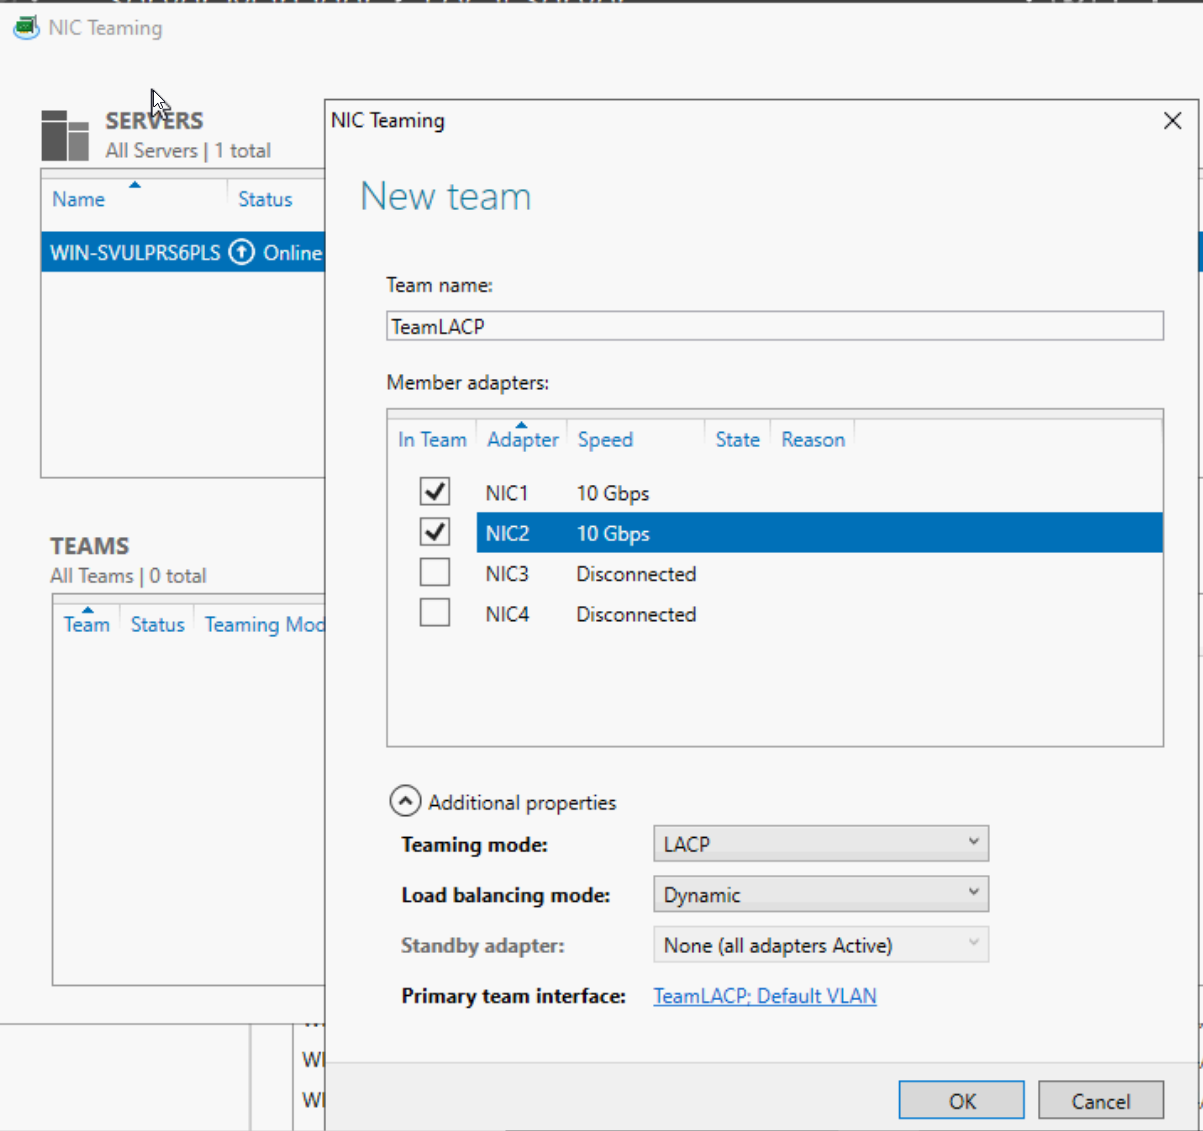
Give the team a name (e.g.,
TeamLACP). -
Select the network adapters you want to include (e.g., NIC1 and NIC2).
-
-
Expand the Additional Properties section.
-
For Teaming mode, select LACP.
-
For Load balancing mode, select Dynamic (recommended).
-
Click OK to create the team.
📌 Step 3: Verify the Team is Created
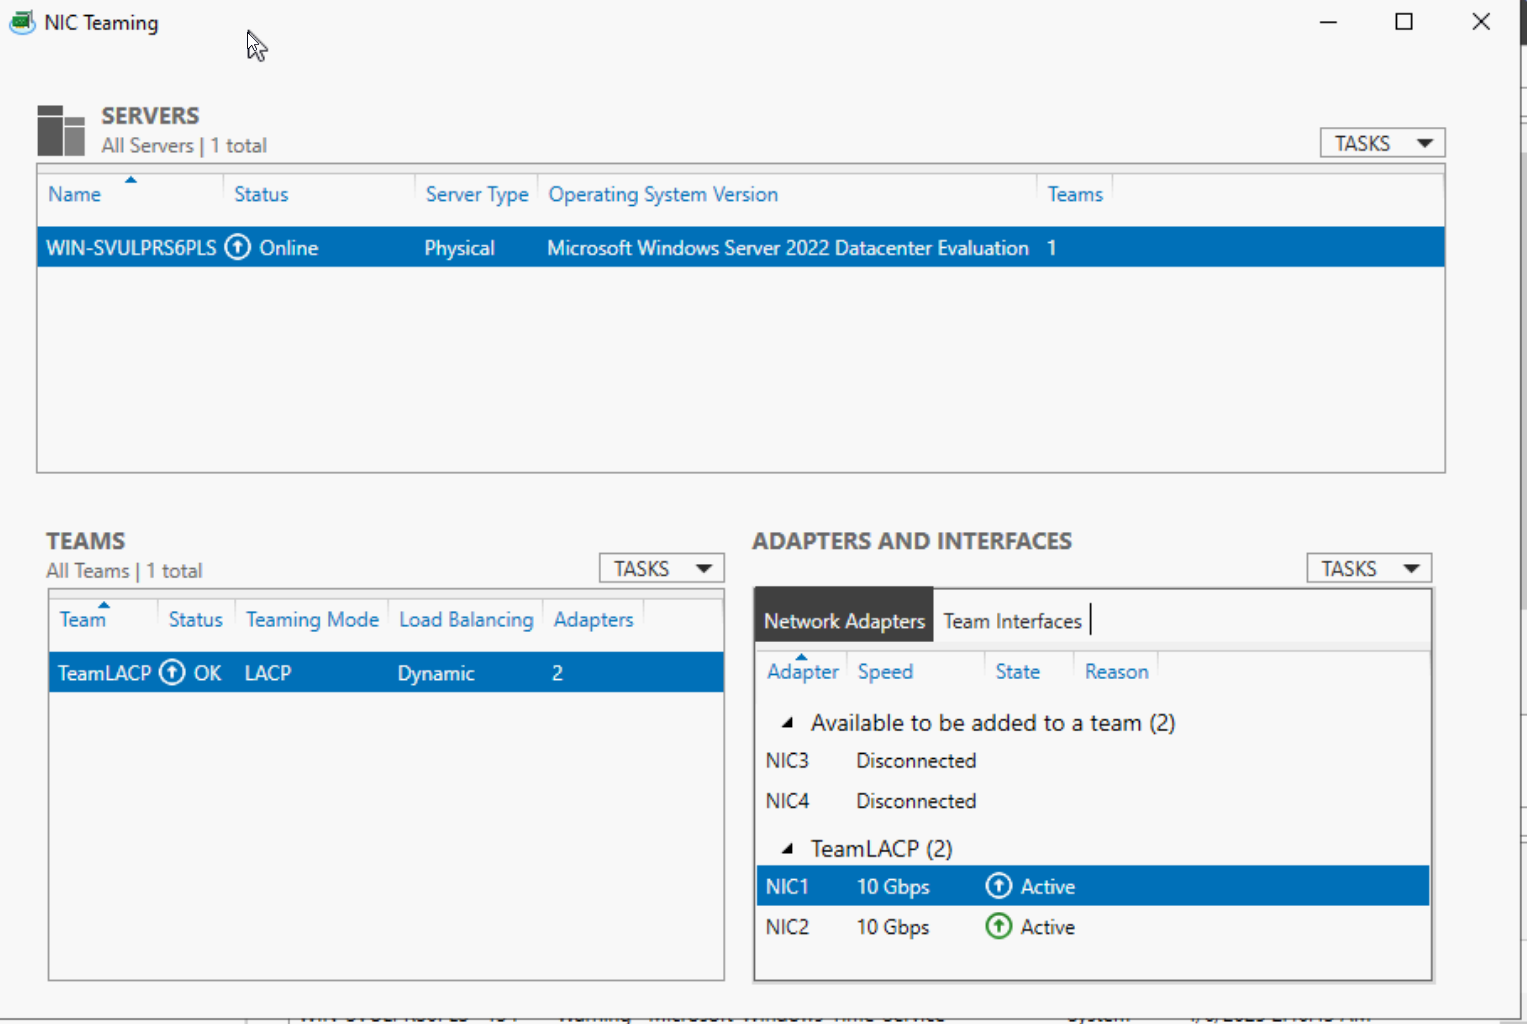
Once created, the new team will appear under the Teams section with:
-
Status: OK
-
Teaming Mode: LACP
-
Load Balancing: Dynamic
-
Number of adapters: 2
You’ll also see the physical adapters listed as Active on the right side of the screen.
📌 Step 4: Check the Network Interface
-
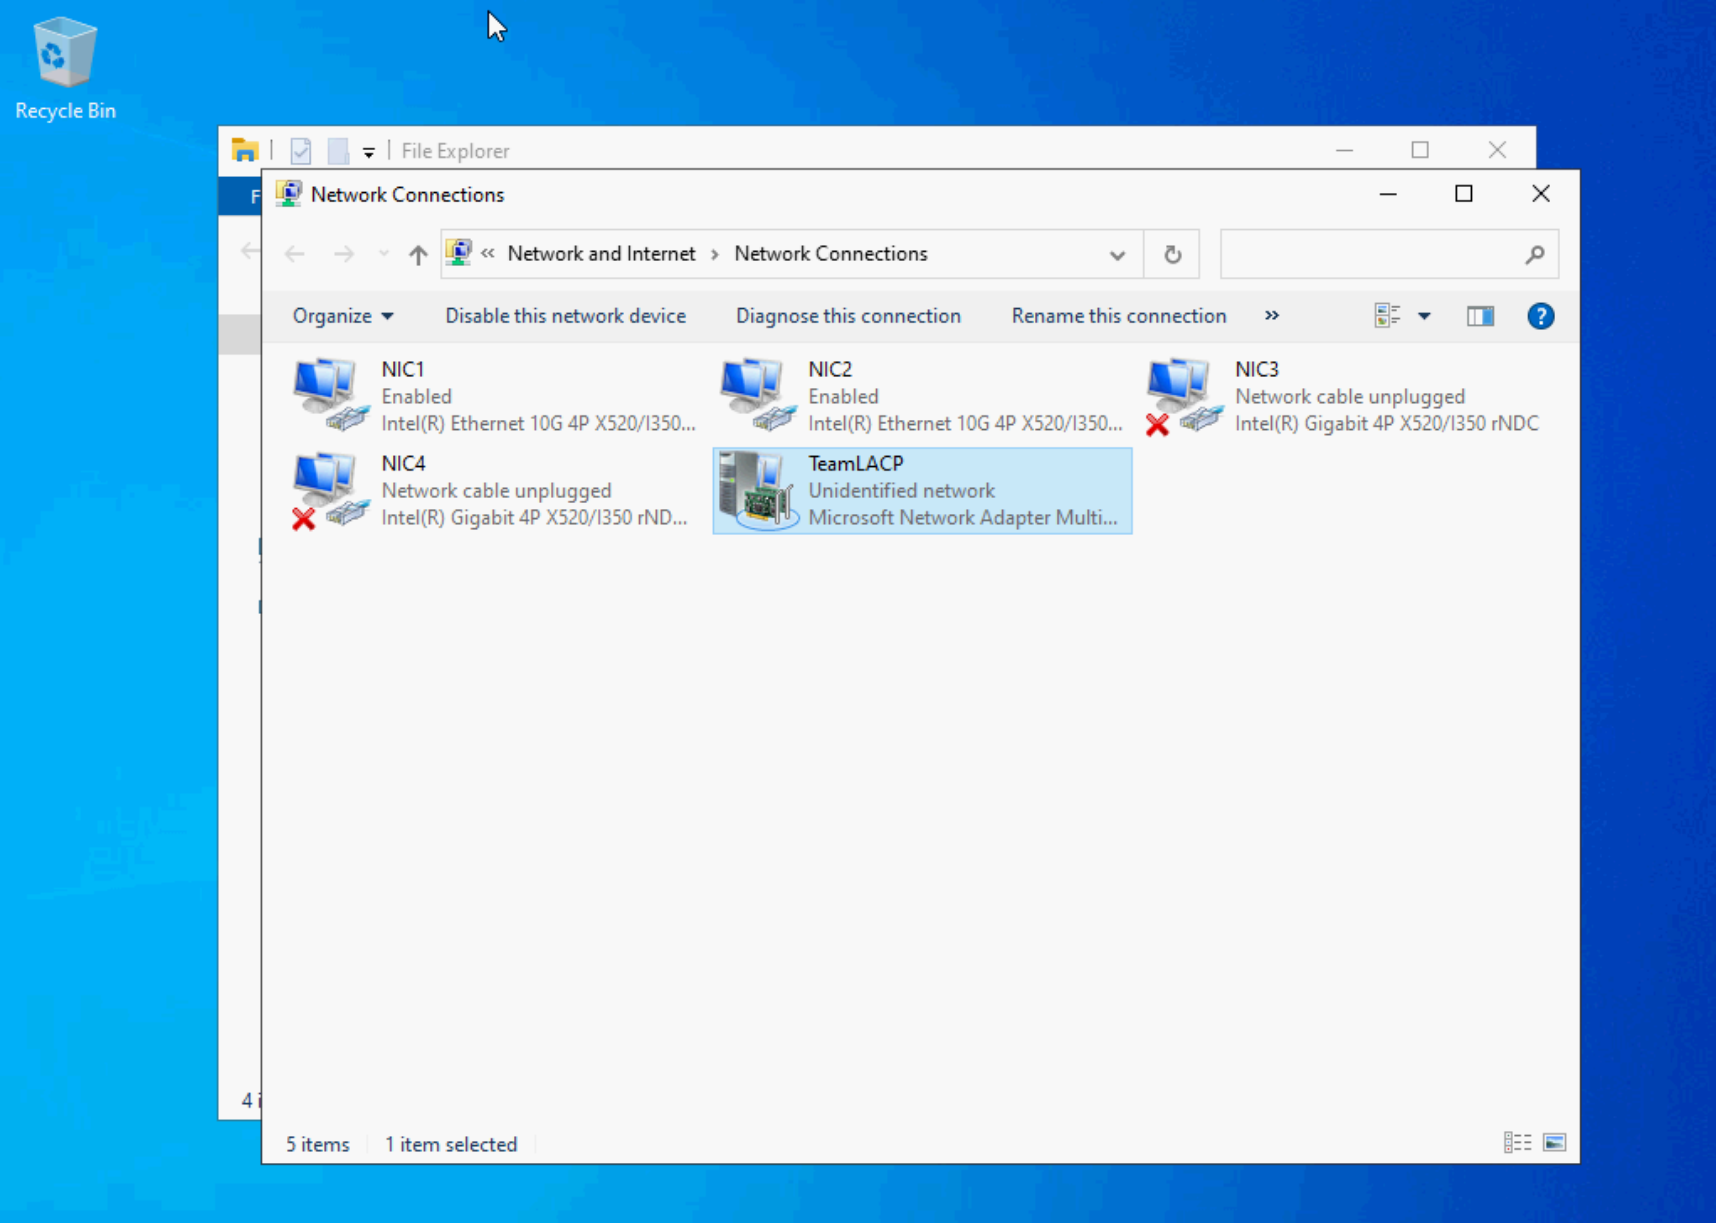
Go to Control Panel > Network and Internet > Network Connections.
-
You will see a new virtual adapter named TeamLACP.
-
Assign a static IP or use DHCP on this new adapter — it is now the primary network interface.
If you’re unable to configure LACP on your server, please don’t hesitate to contact our technical support by clicking here. We’re ready to help you!


